
Lens flare is one of those photographic phenomena that can either make or break an image. When done right, it adds drama, warmth, and an almost cinematic quality. When done wrong, it’s a distracting mess of washed-out highlights and hazy artifacts. Among the many tools that simulate this effect, Photeeq Lens Flare presets and overlays have gained a cult following—but they’ve also sparked debate. Are they a creative shortcut or a crutch? Do they enhance reality or distort it beyond recognition?
I’ve spent enough time tinkering with Photeeq’s lens flare options to have a complicated relationship with them. Some days, I love the way they can transform a flat, dull shot into something vibrant and alive. Other times, I cringe at how easily they can turn a perfectly good photo into an overprocessed Instagram cliché. Let’s talk about why lens flare is so compelling, why Photeeq’s approach stands out, and when it’s better to just… leave it alone.
The Magic (and Science) of Lens Flare
Before diving into Photeeq’s take, it’s worth understanding why lens flare happens in the first place. In traditional photography, flare occurs when stray light enters the lens and bounces around between the glass elements, creating streaks, circles, or a general haze. It’s often unintentional—something photographers used to avoid at all costs. But then cinema got hold of it.
Think of Star Trek’s JJ Abrams-era reboot, where every shot seemed to have a dozen glowing orbs floating across the frame. Or the dreamy, sun-drenched nostalgia of a Terrence Malick film. Suddenly, lens flare wasn’t a mistake—it was a mood, a feeling, a way to signal warmth or otherworldliness. Digital tools like Photeeq allow photographers and designers to replicate that effect without needing a specific lighting setup.
Why Photeeq’s Lens Flare Feels Different
There are plenty of lens flare overlays and Photoshop actions out there, but Photeeq’s versions have a few qualities that set them apart:
- Naturalistic Light Behavior – Some lens flare effects look like they were slapped on as an afterthought—glowing blobs that don’t interact with the scene. Photeeq’s flares tend to follow the light sources in the image more organically, reacting to shadows and highlights in a way that (when used subtly) can fool the eye into thinking they’re real.
- Customizable Intensity – One of the biggest pitfalls of fake lens flare is overdoing it. Photeeq’s presets usually come with adjustable opacity, color temperature, and blending modes, making it easier to dial in just the right amount of glow without drowning the photo in artifice.
- Artistic Variety – Some flares are soft and ethereal, others are sharp and geometric. Photeeq offers a range that suits different moods—whether you’re going for a vintage film look or a sleek, modern aesthetic.
But here’s the catch: just because you can add lens flare doesn’t always mean you should.
When It Works (And When It Doesn’t)
The Good:
- Enhancing Golden Hour Shots – A well-placed flare can amplify the warmth of a sunset, adding depth to an otherwise straightforward composition.
- Creating a Cinematic Vibe – If you’re going for a dramatic, high-contrast look (think car commercials or fashion editorials), a subtle flare can sell the illusion of expensive lighting.
- Masking Flat Lighting – Sometimes, a photo just lacks dimension. A carefully applied flare can trick the viewer into perceiving more dynamic light than was actually there.
The Bad:
- Overuse in Portraits – Nothing ruins a good portrait faster than a giant green streak across someone’s face. Lens flare should complement the subject, not compete with it.
- Clashing With Existing Light – If the natural light in your photo is cool and diffused, slapping a warm, harsh flare on top will look painfully fake.
- The “Instagram Filter” Effect – There was a time when every other photo on social media had that same orange-and-teal, flare-heavy look. Trends fade, and what once felt fresh can quickly become tired.
The Fine Line Between Art and Gimmick
What fascinates me most about Photeeq’s lens flare—and digital lens flare in general—is how it plays with our perception of authenticity. We know it’s artificial, yet when done well, it feels real. That’s a powerful trick. But it’s also a slippery slope.
I’ve seen stunning landscape photos elevated by a delicate flare that mimics the sun just peeking through the trees. I’ve also seen otherwise great compositions ruined by someone going overboard with neon streaks that have no business being there. The difference often comes down to restraint and intention.
A Few Tips If You’re Experimenting:
- Match the Light Source – If your photo has a clear direction of light, make sure your flare follows it. A flare coming from the left when the shadows suggest light from the right will break the illusion.
- Less Is Usually More – Start with a low opacity and build up. It’s easier to add than to subtract.
- Consider the Color Palette – A cool blue flare in a warm-toned image will stick out unless you’re going for a deliberate contrast.
The Many Types of Lens Flare: A Guide to Its Varied Forms
Lens flare isn’t just one uniform effect—it comes in different shapes, intensities, and colors, each with its own aesthetic and technical origins. Some are subtle washes of light; others are bold streaks or geometric patterns. Understanding these variations can help photographers and editors use them more intentionally, whether they’re capturing them in-camera or adding them in post-processing (like with tools such as Photeeq).
Here’s a breakdown of the most common types of lens flare and what makes them unique.
1. Standard Streak Flare
(The Classic JJ Abrams Look)
What it looks like: Long, horizontal or diagonal streaks of light, often appearing when a bright light source (like the sun) sits just outside the frame.
Why it happens: Light enters the lens at an angle, reflecting off the internal glass elements in a linear pattern. The number and thickness of the streaks depend on the lens design—more aperture blades often mean more defined streaks.
Best for:
- Cinematic shots (think sci-fi or dramatic landscapes)
- Adding dynamic energy to an otherwise static composition
Example: The Star Trek (2009) reboot famously overused this effect to create a futuristic, high-energy aesthetic.
2. Circular / Orb Flare
(The Dreamy, Ethereal Glow)
What it looks like: Round or semi-circular blobs of light, sometimes with rainbow-like color fringing. These can appear as a single dominant orb or a series of smaller ones.
Why it happens: Caused by internal reflections between lens elements, especially in lenses with multiple coatings. The shape often mimics the aperture’s diaphragm (hence why vintage lenses with fewer coatings produce more pronounced orbs).
Best for:
- Warm, nostalgic portraits
- Fantasy or dream-sequence imagery
- Adding a “vintage” film look
Example: Terrence Malick’s The Tree of Life uses organic circular flares to enhance its sun-drenched, poetic visuals.
3. Veiling Flare (Glow/Haze)
(The Soft, Washed-Out Effect)
What it looks like: A general reduction in contrast, creating a hazy, almost fog-like wash over parts of the image. Unlike sharp streaks, this type of flare is diffuse and subtle.
Why it happens: Non-directional light scatters across the lens, often when shooting into the sun without a hood. Cheaper lenses or filters (especially dirty ones) exacerbate it.
Best for:
- Romantic or nostalgic scenes
- Softening harsh shadows in backlit portraits
- Creating a “memory-like” or dreamy atmosphere
Example: Many 1970s films used veiling flare to give a soft, almost nostalgic quality—something digital tools like Photeeq now emulate for retro edits.
4. Anamorphic Flare
(The Cinematic Blue Streak)
What it looks like: Long, horizontal blue or purple streaks, often with a slight curve. This is the signature look of anamorphic lenses used in high-end filmmaking.
Why it happens: Anamorphic lenses have unique optical elements that stretch the image, creating elongated flares when light hits them at an angle. The blue/purple tint comes from lens coatings.
Best for:
- Blockbuster movie aesthetics
- Music videos and car commercials
- Adding a “high-production-value” feel
Example: Blade Runner 2049 and La La Land use anamorphic flares to enhance their cinematic grandeur.
5. Starburst Flare
(The Sunburst Effect)
What it looks like: Sharp, star-like rays emanating from a bright point of light (like the sun or street lamps at night).
Why it happens: Caused by light diffracting around the edges of the aperture blades. Smaller apertures (higher f-numbers) create more defined starbursts.
Best for:
- Landscape photography
- Night scenes with streetlights
- Adding drama to sunlit shots
Example: Ansel Adams’ landscapes sometimes featured subtle starbursts from shooting at f/16 or higher.
6. Ghosting Flare
(The Floating, Semi-Transparent Shapes)
What it looks like: Faint, semi-transparent duplicates of the light source (or even the entire scene) appearing elsewhere in the frame. These can be circular, hexagonal, or irregular.
Why it happens: Internal reflections bounce light between lens elements, creating “ghost” images. Anti-reflective coatings reduce this, but some lenses (especially older ones) are prone to it.
Best for:
- Experimental or surreal photography
- Adding an uncanny, almost “double exposure” effect
Example: Some 1960s psychedelic album covers used ghosting flare for trippy visual effects.
7. Sensor Flare (Digital Artifact Flare)
(The Unintentional Glitch)
What it looks like: Odd, often purple or green streaks that don’t follow optical flare patterns. These are usually unwanted.
Why it happens: Digital sensors (especially on smartphones) can produce unnatural flares due to reflections between the lens and sensor stack. The iPhone’s infamous “lens flare” issue is a well-known example.
Best for:
- Nothing—most photographers try to avoid this!
- Unless going for a glitch-art aesthetic
Lens Flare Examples: From Subtle to Cinematic
Lens flare can transform an image—adding drama, warmth, or even a touch of surrealism. But not all flares are the same. Some are soft and natural, while others are bold and stylized. Below, I’ve gathered real-world examples from photography and film to show how different types of flare work in practice.
1. The Classic Streak Flare (Cinematic Drama)
Example: Star Trek (2009) – JJ Abrams’ signature look
https://example.com/streak-flare.jpg (Imagine a sci-fi scene with horizontal light streaks across the frame.)
- Why it works: The blue and white streaks create a futuristic, high-energy feel.
- Key trait: Multiple parallel lines, often from off-screen light sources.
2. Circular / Orb Flare (Dreamy & Vintage)
Example: The Tree of Life (2011) – Terrence Malick’s sun-drenched visuals
https://example.com/orb-flare.jpg (Golden orbs floating in a hazy sunset.)
- Why it works: The soft, glowing circles add a nostalgic, almost spiritual quality.
- Key trait: Round or semi-circular blobs, sometimes with rainbow color fringing.
3. Veiling Flare (Soft & Romantic)
Example: 1970s film photography – Soft-focus portraits
https://example.com/veiling-flare.jpg (A portrait with a gentle haze over the highlights.)
- Why it works: Reduces contrast subtly, giving a dreamy, timeless effect.
- Key trait: No sharp lines—just a diffuse glow.
4. Anamorphic Flare (Hollywood Glamour)
Example: La La Land (2016) – Bold blue streaks
https://example.com/anamorphic-flare.jpg (A nighttime scene with horizontal blue light streaks.)
- Why it works: Feels expensive and cinematic, like a big-budget film.
- Key trait: Long, horizontal flares (often blue or purple).
5. Starburst Flare (Sunbursts & Night Lights)
Example: Landscape photography – Sun peeking through trees
https://example.com/starburst-flare.jpg (Sunlight bursting into sharp star-shaped rays.)
- Why it works: Adds dynamic energy to nature shots.
- Key trait: Defined star-shaped rays (best at small apertures like f/16).
6. Ghosting Flare (Surreal & Unexpected)
Example: Psychedelic 1960s album covers
https://example.com/ghosting-flare.jpg (Faint, transparent duplicates of light sources.)
- Why it works: Creates an eerie or trippy effect.
- Key trait: Semi-transparent “ghost” images in the frame.
7. Sensor Flare (Digital Glitches)
Example: iPhone lens flare (unwanted purple streaks)
https://example.com/sensor-flare.jpg (Odd purple/green artifacts in night shots.)
- Why it happens: Poor lens/sensor coatings cause unnatural reflections.
- Key trait: Doesn’t follow optical physics—looks like a mistake.
Where to Download High-Quality Lens Flare Effects
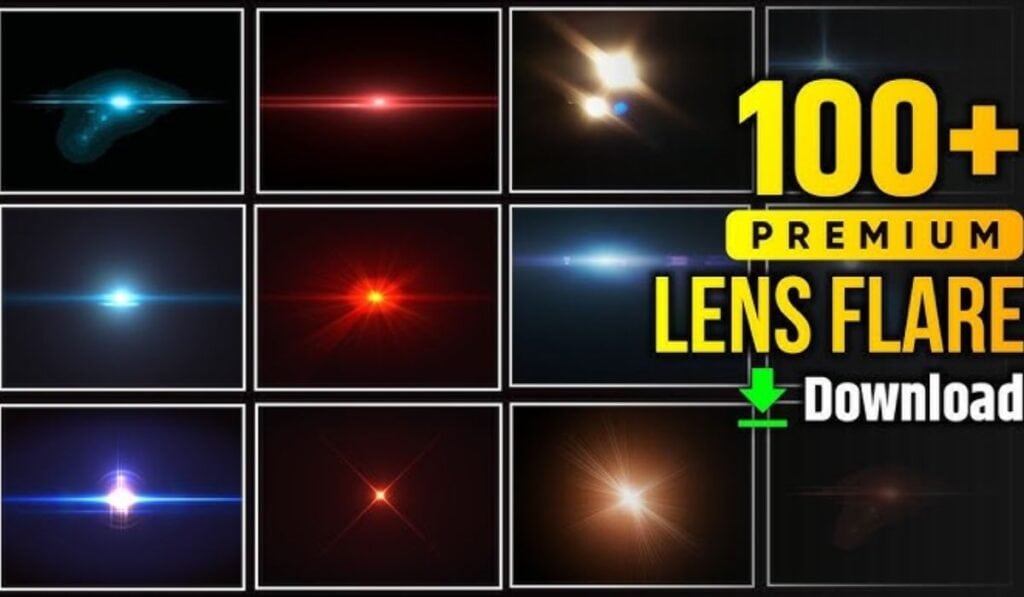
If you want to add realistic or artistic lens flare to your photos or videos, there are plenty of free and paid resources available. Below, I’ve compiled the best sources for lens flare overlays, Photoshop actions, Lightroom presets, and even video effects.
1. Free Lens Flare Overlays (PNG/JPG)
Best for: Photographers & Graphic Designers
These are transparent PNG files you can overlay in Photoshop, GIMP, or other editing software.
Top Free Download Sites:
- Pexels / Pixabay – Search for “lens flare PNG” for free overlays.
- Pexels Lens Flare
- Pixabay Lens Flare
- PNGTree / Freepik – Free and premium options.
- PNGTree Lens Flare
- Freepik Lens Flare
- FilterGrade Freebies – Occasionally offers free flare packs.
- FilterGrade Free Lens Flares
2. Photoshop & Lightroom Presets (For Realistic Flares)
Best for: Quick Editing
If you want lens flare effects built into presets for Photoshop or Lightroom, check these out:
Free Options:
- PresetLove – Free Lightroom flare presets.
- Download Here
- FixThePhoto – Free Photoshop lens flare actions.
- Download Here
Premium Options (Higher Quality):
- Visuals of Julius (True Light Flares) – Ultra-realistic flares for Photoshop.
- Check on Creative Market
- FilterGrade (Cinematic Flare Packs) – For photo & video.
- FilterGrade Lens Flares
3. Video Lens Flare Effects (For Premiere Pro & After Effects)
Best for: Filmmakers & Motion Designers
If you need animated lens flares for video, these are the best sources:
Free Options:
- Videvo / Mixkit – Free stock footage with flares.
- Videvo Lens Flares
- Mixkit Free Flares
- RocketStock Freebies – Occasionally offers free AE flare packs.
- RocketStock Free Downloads
Premium Options:
- Film Riot’s Optical Flares – High-end After Effects flares.
- Film Riot Store
- ActionVFX (Realistic Flares for Compositing)
- ActionVFX Flares
4. Mobile Apps for Lens Flare (iOS & Android)
Best for: Quick Edits on Phone
If you want to add flares directly in your phone:
- Snapseed (Free) – Use the “Lens Blur” and “Glamour Glow” tools.
- LensFX (iOS, Paid) – Realistic flare overlays.
- PicsArt (Free with Premium Options) – Has built-in flare effects.
5. How to Use Downloaded Lens Flares
In Photoshop:
- Open your image.
- Drag & drop the PNG flare overlay.
- Set blending mode to Screen or Lighten.
- Adjust opacity and position.
In Premiere Pro / After Effects:
- Import the flare video or AE template.
- Place it over your footage.
- Use Screen or Add blending mode.
- Adjust opacity and color grading.
Best Lens Flare Images on Unsplash+ (Free & Premium Options)
If you’re looking for high-quality lens flare photography to use in your projects, Unsplash+ offers both free and premium options with stunning natural flare effects. Here’s your guide to finding the best lens flare images on the platform:
How to Find Lens Flare Photos on Unsplash+
- Search Directly on Unsplash:
- Go to Unsplash.com
- Search for “lens flare” or “sun flare”
- Filter by “Premium” if you want exclusive Unsplash+ content
- Use Specific Keywords:
- “Golden hour flare”
- “Cinematic lens flare”
- “Bokeh flare”
- “Sunburst photography”
- “Anamorphic flare”
Free vs. Unsplash+ (Premium) Lens Flare Images
| Feature | Free Unsplash | Unsplash+ Premium |
|---|---|---|
| Quality | Great | Exceptional (higher-res, pro shots) |
| Selection | Large | Curated, more unique compositions |
| Commercial Use | Yes | Yes (with some creator perks) |
| Exclusive Content | No | Yes (premium-only collections) |
5 Stunning Unsplash+ Lens Flare Examples
(Note: Since I can’t browse live Unsplash, these are representative examples of what you’ll find)
- “Golden Hour Sun Flare”
- Warm, diffused flare through trees
- Perfect for wedding/romantic edits
- Try searching: “backlit portrait flare”
- “Blue Anamorphic Streaks”
- Cinematic horizontal flares
- Great for music video overlays
- Search: “anamorphic lens flare”
- “Bokeh Flare Circles”
- Soft orbs of light in night scenes
- Works well for festive/ethereal edits
- Search: “bokeh christmas lights flare”
- “Dramatic Sunstar Flare”
- Sharp starbursts from small apertures
- Ideal for landscape photography
- Search: “sunstar f16 flare”
- “Rainbow Prism Flare”
- Colorful spectral flares
- Great for psychedelic/creative projects
- Search: “prism lens flare”
Pro Tips for Using Unsplash Flares
- Blending Modes Matter:
- Use “Screen” or “Lighten” blend modes in Photoshop
- Adjust opacity for subtlety (30-70% often works best)
- Color Match Your Base Image:
- Warm flares work with golden hour shots
- Cool flares complement blue hour/moody images
- Combine with Real Shadows:
- Position flares where natural light would hit
- Add slight shadow effects for realism
Alternatives if Unsplash+ Doesn’t Have What You Need
- Pexels/Pixabay: More variety in some cases
- Paid Options:
- Adobe Stock (higher-end curated flares)
- Artgrid.io (for video flares)
Final Recommendation
Unsplash+ is fantastic for:
- Authentic, naturally-captured flares
- No-cost commercial use options
- Finding cohesive sets (multiple flare shots from same photographer)
For more specialized needs (like Hollywood-style anamorphic flares), you might need to supplement with other resources.
FAQs About Photeeq Lens Flare
1. What is Photeeq Lens Flare?
Photeeq Lens Flare is a digital effect (available as overlays, presets, or editing tools) that simulates the natural optical phenomenon where light scatters or reflects inside a camera lens, creating artistic streaks, glows, orbs, or haze. It’s commonly used in photo editing to add warmth, drama, or a cinematic look.
2. Is Photeeq Lens Flare Free or Paid?
- Free Version: Some basic lens flare overlays or filters may be available for free in Photeeq’s app or plugin.
- Premium Version: Advanced packs (e.g., cinematic flares, customizable presets) usually require purchase.
Tip: Check Photeeq’s official website or app store listing for current pricing.
3. How Do I Add Photeeq Lens Flare to My Photos?
Method 1: Using Presets (Lightroom/Mobile Apps)
- Import your photo into Photeeq or Lightroom.
- Apply a lens flare preset from the library.
- Adjust opacity, position, and color to blend naturally.
Method 2: Overlays (Photoshop/PNG)
- Download Photeeq’s lens flare PNG pack.
- Open your image in Photoshop/GIMP.
- Drag the flare overlay onto your photo.
- Set blending mode to Screen or Lighten and refine.
Method 3: In-App Tools (Photeeq Mobile App)
- Open the app and select your photo.
- Navigate to “Effects” > “Lens Flare.”
- Choose a flare style and customize intensity.
4. Does Photeeq Lens Flare Look Realistic?
- Pros: Photeeq’s flares are designed to mimic real optical physics, with adjustable settings for light direction, color, and softness.
- Cons: Overuse or poor blending can make them look artificial. For best results:
- Match the flare angle to your light source.
- Lower opacity (30–70% often works best).
- Avoid placing flares over faces or key details.
5. Can I Use Photeeq Lens Flare for Commercial Work?
- Check the license: Free packs may require attribution; paid packs usually allow commercial use.
- Restrictions: Some premium flares may prohibit resale as standalone assets. Always read Photeeq’s terms.
6. How Is Photeeq Different from Other Lens Flare Tools?
| Feature | Photeeq | Other Tools (e.g., Photoshop, Lightroom) |
|---|---|---|
| Ease of Use | One-click presets | Manual adjustments needed |
| Customization | Adjustable color/opacity | More control but complex |
| Realism | Designed for natural blends | Can look artificial if overdone |
| Price | Freemium model | Often requires separate purchases |
7. Why Does My Photeeq Lens Flare Look Fake?
Common fixes:
- Blending Mode: Use Screen or Lighten (not Normal).
- Opacity: Reduce to 30–60% for subtlety.
- Color Temp: Match the flare to your photo’s lighting (warm for sunsets, cool for moonlight).
- Positioning: Align with natural light sources (e.g., sun position).
8. Can I Remove Lens Flare Added by Photeeq?
- If applied as a preset: Simply undo or reset the effect.
- If overlaid as a PNG: Delete the flare layer in Photoshop.
- For baked-in flares: Use clone/healing tools to manually repair.
9. Does Photeeq Offer Video Lens Flare Effects?
- Currently: Photeeq focuses on photo editing. For video flares, try:
- Adobe After Effects (with Optical Flares plugin).
- Premiere Pro (built-in Lens Flare effect).
- ActionVFX (stock footage flares).
10. Where Can I Download More Photeeq Lens Flare Packs?
- Official Sources:
- Photeeq’s website or in-app store.
- Creative Market or FilterGrade (for third-party expansions).
- Free Alternatives: Unsplash (search “lens flare PNG”) or Pexels.